Hi everybody. I have been using SAWO labs API as my primary authentication tool for the last couple of months due to the ease of integration and customization on the go. However, I found that many people were having trouble integrating the API.
Therefore, we needed to go beyond the official documentation and offer a walkthrough for integrating SAWO Labs authentication with a Basic React app.
So let's start our SAWO Jounrney together 🤝
Creating your first project on Sawolabs is easy. Simply select the platform, select the platform to develop on localhost, or set Host to the URL of your application if you are developing remotely.
As a platform, we will select the web!
Baisc Features of the WEB APP
- Login Page
- User Dashboard
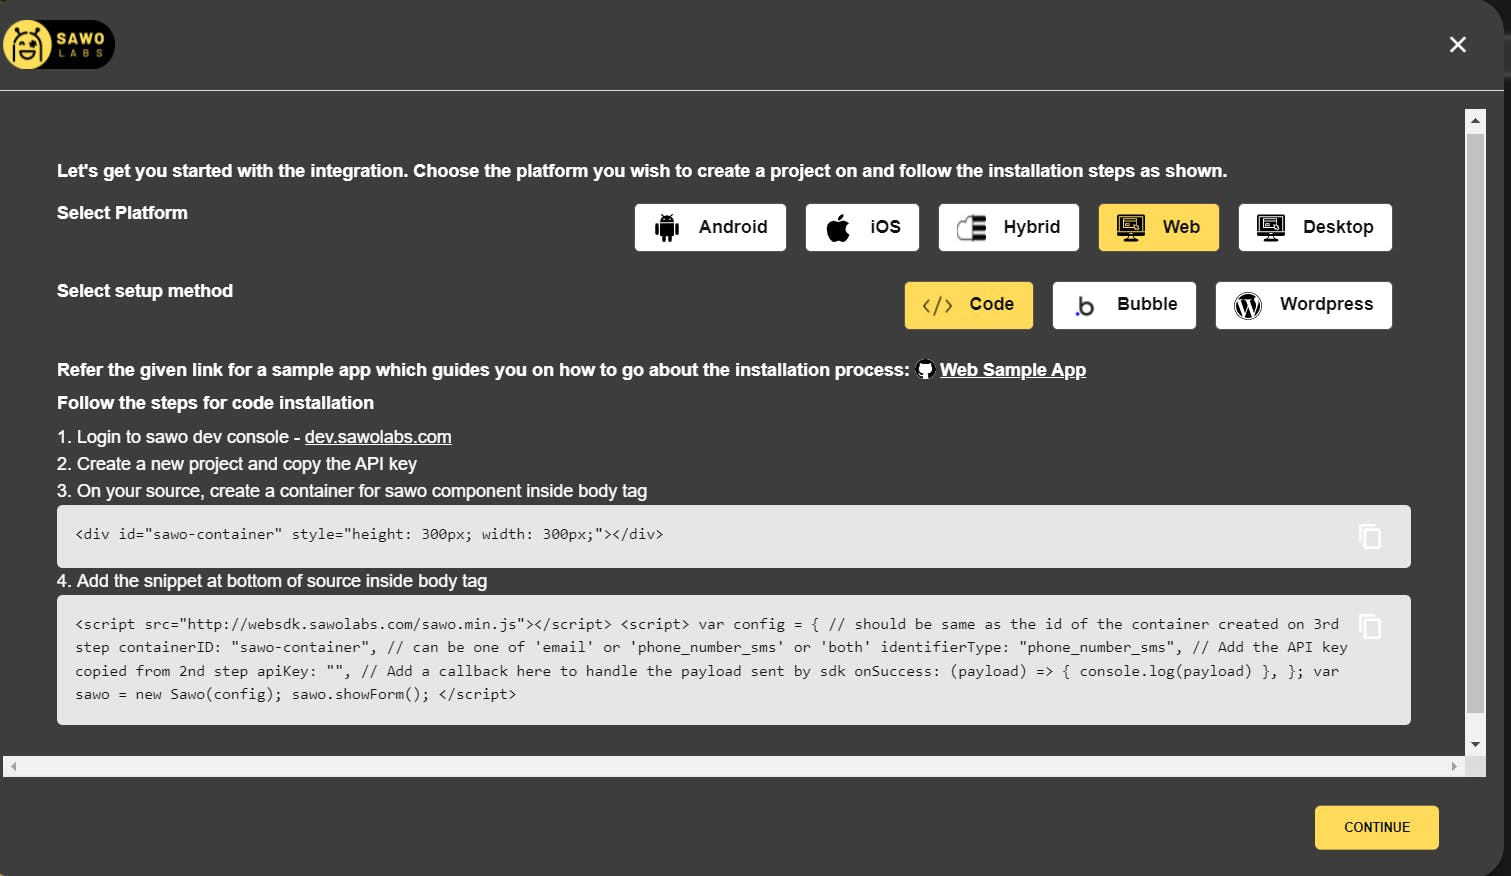 Click continue,
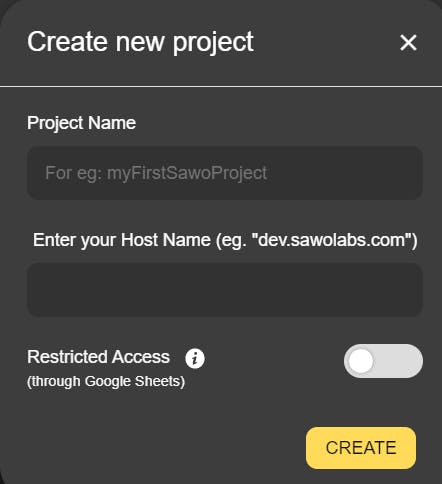 Finally give a suitable name and then create
P.S: If you are developing locally, set the HOST name as localhost
- Run
npx create-react-appProject in VScode to create a react app.
We need SAWO labs in node_modules to make this work. So head over to the terminal and make sure that you have entered the above command:
To open the terminal: Use the (Ctrl+`) or simply open from the navbar
Now, head ovet to you Project Folder using the command in the terminal
cd <ProjectPath>
Now, Let's install the sawo sdk in our Sample React App. For this type the command in the VS CODE terminal
npm install sawo
or
npm i sawo
- After the package has been installed, open the src/app.js file and import the SAWO package :-
import React from "react";
import "./App.css";
import Sawo from "sawo";
function App() {

let [payload, setPayload] = React.useState(false);

React.useEffect(() => {
  var config = {
      containerID: "sawo-container",
      identifierType: "email",
      apiKey: process.env.REACT_APP_API_SAWO,
      onSuccess: (payload) => {
        // console.log(payload);
        setPayload(payload)
      },
    };
    let sawo = new Sawo(config);
    sawo.showForm();
 }, []);

   return (
         <div
          id="sawo-container"
          style={{ height: "300px", width: "300px" }}
        ></div>
  );
}
export default App;
also for the SAWO API to work you need the API key, which we get from the project console:-
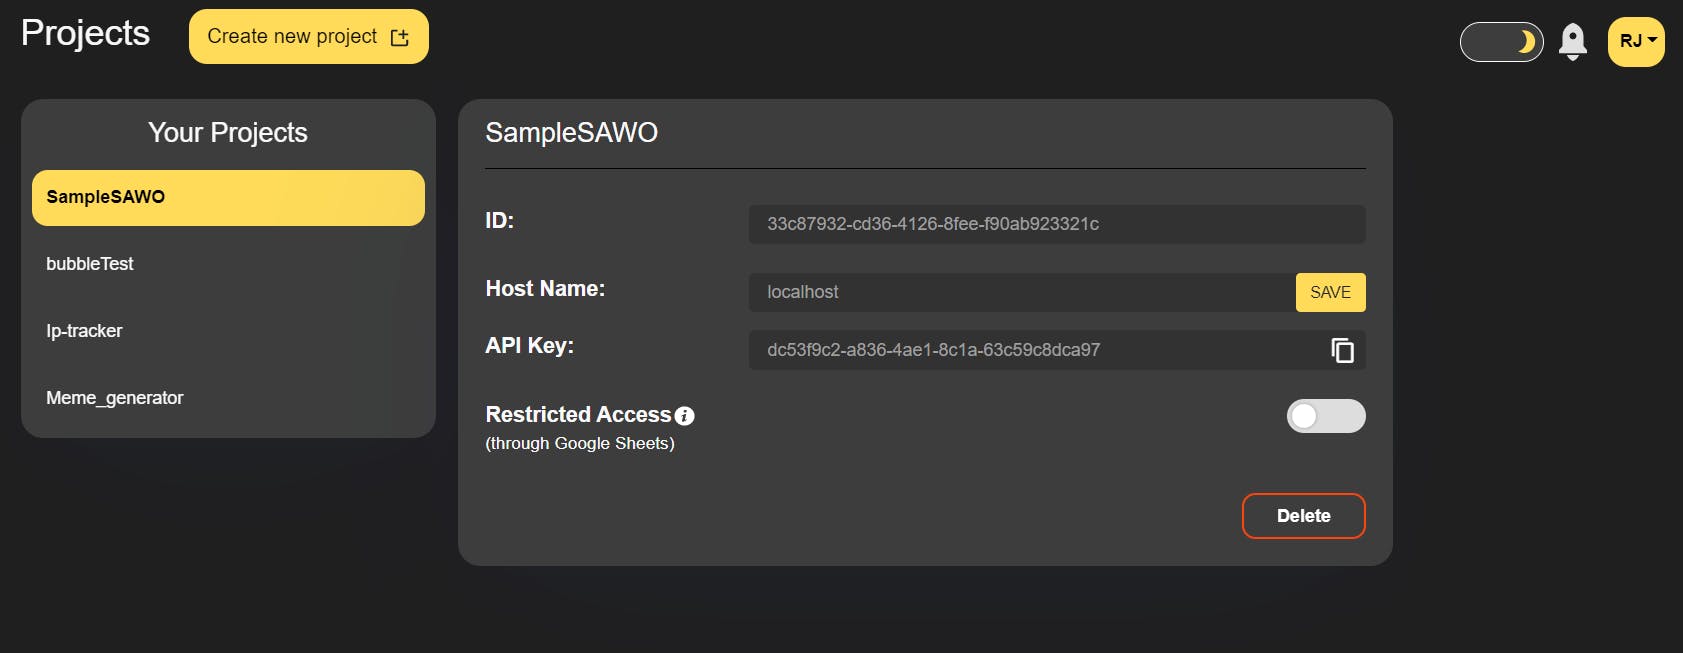
Make sure you save your API Key in your .env file and add it to .gitignore before it. You should have a file that looks like this: - React_SAWO_API : Sample_API_KEY123456
Making Dashboard
- We are going to create a file
src/Dashboard.js, which looks like this: -
import React from "react";
const Dashboard = (props) => {
return (
 <>
    <h2>Private Dashboard</h2>
     Email: {props.payload.identifier}
 </>
);
};
export default Dashboard;
Note that because we utilise email for authentication, props.payload.identifier will yield the user's EMAIL-ID.
- Now we need to add the dashboard component to our app.js
COPY
import React from "react";
import logo from "./logo.svg";
import "./App.css";

//Dashboard Component

import Dashboard from './dashboard'
import Sawo from "sawo";
function App() {

let [payload, setPayload] = React.useState(false);

React.useEffect(() => {
  var config = {
      containerID: "sawo-container",
      identifierType: "email",
      apiKey: process.env.REACT_APP_API_SAWO,
      onSuccess: (payload) => {
        // console.log(payload);
        setPayload(payload)
      },
    };
    let sawo = new Sawo(config);
    sawo.showForm();
 }, []);
 return (<>
         <div
          id="sawo-container"
          style={{ height: "300px", width: "300px" }}
        ></div>
        {payload && (
        <>
          <Dashboard payload={payload} />
        </>
        )}
</>
  );
}
export default App;
And it's done, You have successfully created your first react project and integrated SAWO API in it.
Join the SAWO LABS Community to know more about it

